Coming to you from Portland
This is another idea I got from Pinterest. The idea came from this website where someone sells these for $65, but I thought I would try to do it myself.
I bought a little wooden plaque from Craft Warehouse for $2, some green paint for $1, a roll of crochet thread for $3 and some 1/2 inch nails for $2. First I painted the plaque. Then I found an outline of Oregon online and cut it out. I taped this on the surface of the plaque where I wanted it and then nailed around the outline. This was the hardest part, because the nails are really tiny and it starts to hurt your fingers after awhile from holding them in place. Then I nailed the heart, which is approximately where Portland is located. Finally, I wrapped the crochet thread around the nails on the outside to connect with the heart on the inside. This was kind of difficult, because the heart has so few nails and the thread starts to stack up pretty quickly after wrapping around the same nail so many times. I also didn't know how to tie it off so you can see a knot at the bottom of the picture. I'm sure there is a cleaner way to do that. It only took me about two and a half hours to make and $8 for the supplies. The final product was just okay - worth $8 but definitely not $65 even if it was better than mine. In the end it's just something to hang or lean against your wall.
Showing posts with label art. Show all posts
Monday, May 14, 2012
Tuesday, December 6, 2011
photos to art
coming to you from pullman
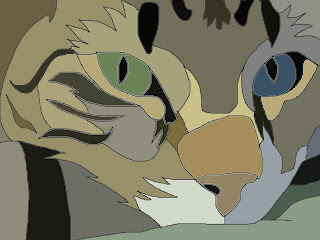
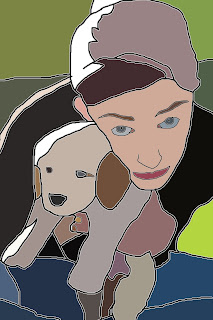
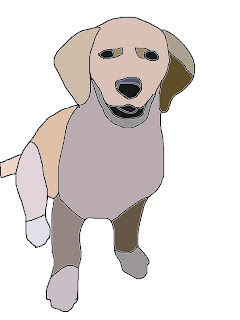
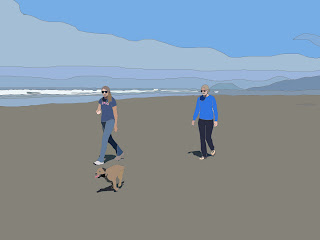
there is probably a program on the internet that will do this to photos for you, but 1. i could not find one, 2. it's sort of fun to do, and 3. you get to change it however you want! the one of ellie by herself is the first one that i made. the reason i made it was because i wanted to make ellie out of fabric, but needed a pattern, so i devised a way to make a simple-ish pattern using photoshop. i have since decided that i don't have the quilting skills to make ellie into fabric - and also had a revelation that my love for ellie may have taken a creepy turn. still, i continue to have trouble fighting my compulsion to make a likeness of ellie out of fabric. anyway, in my efforts, i stumbled across a really cool technique that you can use to turn photos into art. (instructions below)


How To Turn My Photo into Art:
1. Choose a photo that you like. No need to spend time making a photo you don't like into art. Keep in mind, the more detailed the photo, the longer it will take, and human faces are harder to get just right.
2. Open photo in photoshop or some other program that has a "layering" function.
3. On the tool bar go to Layer>New>Layer... and this dialog box will pop up. Press "OK"
4. Now you can trace your photo using the pencil tool (you can use different thicknesses of "pencil" depending on the level of detail that you want)
5. When you are done tracing, remove the picture layer (the background layer) and you will just be left with the tracing that you made (note: do not forget to make the layer before you spend an hour tracing the photo. you will regret this)
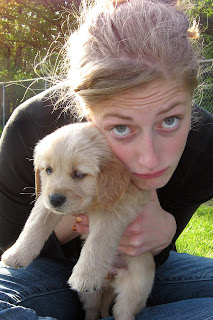
6. Next, use the eyedropper tool, to select a colors from the original photo and use the paint bucket tool to fill each of the outlined areas. Sometimes I had to fish around a little to find a representative color. I am always surprised by the colors that the eyedropper picks up though. Our brain is so good and altering our perception of pictures and color because it knows how light and shadows work. For instance, in this photo, Ellie's left arm comes out grey. I think of ellie as blond, but if you just look at her arm in the original picture out of context, it is in fact a greyish tan color. Anyway, I digress... another idea would be to fill in a picture with bright, unrealistic colors.
Have fun! And 10 days till the semester is over.
Subscribe to:
Posts (Atom)