Thursday, December 29, 2011

Famiy Christmas Card

Coming to you from Portland


I know this is cruel, but she is so cute!  This is the picture we used for our Christmas cards.  She always runs away from me when I grab one of her outfits, but once I get it on her she stands completely still, which makes her easily maneuverable.  All we had to do was upload the picture onto the Walgreens website and choose from one of their Christmas borders.  It was $10 for each set of 20 - a very simple way to pump out your cards a week before Christmas. 

Ribeye Steak with Blue Cheese Butter and Walla Walla Onion Rings

Coming to you from Portland


The one from Laurelhurst Market is above and mine is below.


I got this recipe from one of my bon appetit magazines which I featured on a previous post.  I was hoping to duplicate the look and taste of this menu item from Laurelhurst Market and then go to the restaurant and compare, but it goes for $38 so I might have to wait to do that taste test for when I have a real job.  I was very pleased with how mine turned out.  It was very easy and the onion rings were really fun to make.  The onion ring crust is light (nothing like the thick fried ones you get at Red Robins) which I love.  They are best served hot, but you have to cook them in batches so once they make it to the table they have cooled down a bit.  I added a bed of spinach to place the steak on to soak up the juices and add a little color.  I spent about $30 for three servings of this meal, so that's quite a bargain compared to the restaurant price, and I'm going to venture to say the quality of my dish is comperable even though I've never tasted the original.

Thursday, December 15, 2011

Sky High Apple Cranberry Pie...That totally rhymes

Coming to you from Portland

Martha's is the one above and mine is the one below


This is another one from Martha - a recipe from her Thanksgiving issue.  Nobody thought this would work because there was so much filling and the top of the pie was a good 6-8 inches tall, but Martha says to just keep piling on the filling even if it looks like too much, because the top crust is made extra wide to seal it up.  The recipe says to top the pie with sanding sugar, but I could not find such a thing at the grocery store.  I ended up sprinkling it with raw suger which is a large granule brown colored sugar.  It doesn' say to foil the crust, but this pie goes in the oven for almost two hours so I secured some strips of foil aroung the crust to keep it from burning and it turned out perfect.  Make sure to set the pie dish on a rimmed baking sheet!  This pie is designed so that it will inevitable overflow with juices (as you can see by the pictures).  Luckily my mom was finished with all of the Thanksgiving cooking by the time I lined the bottom of the oven with cranberry drippings.  I cut it right away because I was so excited, but the filling needs time to set.  It turned out great asthetically and tasted delicious too.  I served it hot with a couple of scoops of vanilla ice cream.

Tuesday, December 6, 2011

photos to art

coming to you from pullman

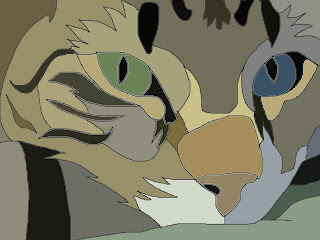
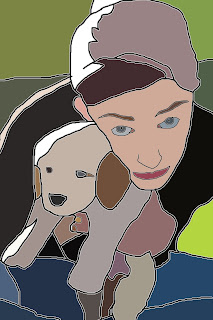
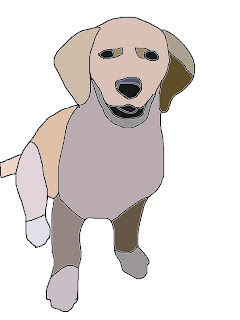
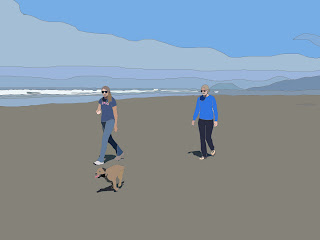
there is probably a program on the internet that will do this to photos for you, but 1. i could not find one, 2. it's sort of fun to do, and 3. you get to change it however you want!  the one of ellie by herself is the first one that i made.  the reason i made it was because i wanted to make ellie out of fabric, but needed a pattern, so i devised a way to make a simple-ish pattern using photoshop.  i have since decided that i don't have the quilting skills to make ellie into fabric - and also had a revelation that my love for ellie may have taken a creepy turn. still, i continue to have trouble fighting my compulsion to make a likeness of ellie out of fabric.  anyway, in my efforts, i stumbled across a really cool technique that you can use to turn photos into art.  (instructions below)


How To Turn My Photo into Art:
1. Choose a photo that you like.  No need to spend time making a photo you don't like into art.  Keep in mind, the more detailed the photo, the longer it will take, and human faces are harder to get just right.
2. Open photo in photoshop or some other program that has a "layering" function.
3. On the tool bar go to Layer>New>Layer... and this dialog box will pop up.  Press "OK"
4. Now you can trace your photo using the pencil tool (you can use different thicknesses of "pencil" depending on the level of detail that you want)

5. When you are done tracing, remove the picture layer (the background layer) and you will just be left with the tracing that you made (note: do not forget to make the layer before you spend an hour tracing the photo.  you will regret this)
6. Next, use the eyedropper tool, to select a colors from the original photo and use the paint bucket tool to fill each of the outlined areas.  Sometimes I had to fish around a little to find a representative color.  I am always surprised by the colors that the eyedropper picks up though.  Our brain is so good and altering our perception of pictures and color because it knows how light and shadows work.  For instance, in this photo, Ellie's left arm comes out grey. I think of ellie as blond, but if you just look at her arm in the original picture out of context, it is in fact a greyish tan color.  Anyway, I digress... another idea would be to fill in a picture with bright, unrealistic colors. 

7. Once all the color is filled in, save as a JPEG file and you are done! 

Have fun!  And 10 days till the semester is over.