Thursday, December 29, 2011

Famiy Christmas Card

Coming to you from Portland


I know this is cruel, but she is so cute!  This is the picture we used for our Christmas cards.  She always runs away from me when I grab one of her outfits, but once I get it on her she stands completely still, which makes her easily maneuverable.  All we had to do was upload the picture onto the Walgreens website and choose from one of their Christmas borders.  It was $10 for each set of 20 - a very simple way to pump out your cards a week before Christmas. 

Ribeye Steak with Blue Cheese Butter and Walla Walla Onion Rings

Coming to you from Portland


The one from Laurelhurst Market is above and mine is below.


I got this recipe from one of my bon appetit magazines which I featured on a previous post.  I was hoping to duplicate the look and taste of this menu item from Laurelhurst Market and then go to the restaurant and compare, but it goes for $38 so I might have to wait to do that taste test for when I have a real job.  I was very pleased with how mine turned out.  It was very easy and the onion rings were really fun to make.  The onion ring crust is light (nothing like the thick fried ones you get at Red Robins) which I love.  They are best served hot, but you have to cook them in batches so once they make it to the table they have cooled down a bit.  I added a bed of spinach to place the steak on to soak up the juices and add a little color.  I spent about $30 for three servings of this meal, so that's quite a bargain compared to the restaurant price, and I'm going to venture to say the quality of my dish is comperable even though I've never tasted the original.

Thursday, December 15, 2011

Sky High Apple Cranberry Pie...That totally rhymes

Coming to you from Portland

Martha's is the one above and mine is the one below


This is another one from Martha - a recipe from her Thanksgiving issue.  Nobody thought this would work because there was so much filling and the top of the pie was a good 6-8 inches tall, but Martha says to just keep piling on the filling even if it looks like too much, because the top crust is made extra wide to seal it up.  The recipe says to top the pie with sanding sugar, but I could not find such a thing at the grocery store.  I ended up sprinkling it with raw suger which is a large granule brown colored sugar.  It doesn' say to foil the crust, but this pie goes in the oven for almost two hours so I secured some strips of foil aroung the crust to keep it from burning and it turned out perfect.  Make sure to set the pie dish on a rimmed baking sheet!  This pie is designed so that it will inevitable overflow with juices (as you can see by the pictures).  Luckily my mom was finished with all of the Thanksgiving cooking by the time I lined the bottom of the oven with cranberry drippings.  I cut it right away because I was so excited, but the filling needs time to set.  It turned out great asthetically and tasted delicious too.  I served it hot with a couple of scoops of vanilla ice cream.

Tuesday, December 6, 2011

photos to art

coming to you from pullman

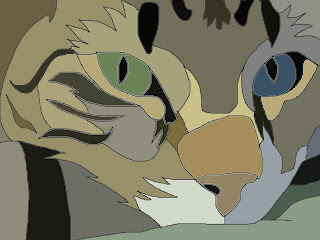
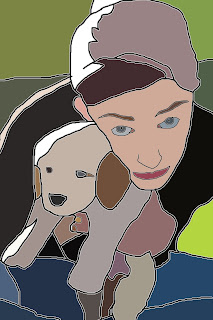
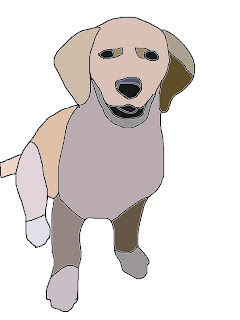
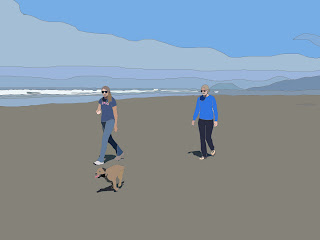
there is probably a program on the internet that will do this to photos for you, but 1. i could not find one, 2. it's sort of fun to do, and 3. you get to change it however you want!  the one of ellie by herself is the first one that i made.  the reason i made it was because i wanted to make ellie out of fabric, but needed a pattern, so i devised a way to make a simple-ish pattern using photoshop.  i have since decided that i don't have the quilting skills to make ellie into fabric - and also had a revelation that my love for ellie may have taken a creepy turn. still, i continue to have trouble fighting my compulsion to make a likeness of ellie out of fabric.  anyway, in my efforts, i stumbled across a really cool technique that you can use to turn photos into art.  (instructions below)


How To Turn My Photo into Art:
1. Choose a photo that you like.  No need to spend time making a photo you don't like into art.  Keep in mind, the more detailed the photo, the longer it will take, and human faces are harder to get just right.
2. Open photo in photoshop or some other program that has a "layering" function.
3. On the tool bar go to Layer>New>Layer... and this dialog box will pop up.  Press "OK"
4. Now you can trace your photo using the pencil tool (you can use different thicknesses of "pencil" depending on the level of detail that you want)

5. When you are done tracing, remove the picture layer (the background layer) and you will just be left with the tracing that you made (note: do not forget to make the layer before you spend an hour tracing the photo.  you will regret this)
6. Next, use the eyedropper tool, to select a colors from the original photo and use the paint bucket tool to fill each of the outlined areas.  Sometimes I had to fish around a little to find a representative color.  I am always surprised by the colors that the eyedropper picks up though.  Our brain is so good and altering our perception of pictures and color because it knows how light and shadows work.  For instance, in this photo, Ellie's left arm comes out grey. I think of ellie as blond, but if you just look at her arm in the original picture out of context, it is in fact a greyish tan color.  Anyway, I digress... another idea would be to fill in a picture with bright, unrealistic colors. 

7. Once all the color is filled in, save as a JPEG file and you are done! 

Have fun!  And 10 days till the semester is over. 

Friday, November 18, 2011

epic p-town sisters weekend

Julie came to Pullman!  We were in the same "P-town" for 4 days - Halloween weekend.  I didn't have an exam to worry about, and I was off of surgery block the following week, so we basically chilled, and cooked, and partied, and were crafty the whole time (well, Julie worked on the house when I was at school).

WSU vs. U of O


What are the chances that the weekend that Julie comes to visit, the cougs are playing the ducks?  I didn't have a lot of hope that we would win, but enough to watch the game at a local bar.  Julie insisted on wearing duck gear so I took her to my favorite bar where I knew there wouldn't be very many people - particularly, no drunk coug fans that were going to be drunk and disappointed.  See what a good sister I am, protecting my sister like that?


I think that the cougs did a good job of hanging in there in the first half.  And I think our 2 point conversion in the last 2 minutes of the game despite being behind by quite a bit really highlights our heart.  The coug fans never give up, so I really appreciate when the coug football team doesn't give up either.  I had the fish and chips as usual with extra cole slaw and Julie had a very unique southern style burger with a vegetarian patty made of black beans and corn.  Delicious! 

Halloween Festivities


Costumes were Julie: cheerleader night one and girl from future night two.  the cheerleader costume that she wore was my mom's when she was in high school.  and michelle (me) in the ghost costume.  i've been planning that one for a while.  I have decided i'm going to be a minimalist, on halloween anyway.  and i'm not going to flaunt my sexuality and use halloween as an excuse to be half naked in public.  nothing against that...just seems like a lot of work, and since we were on the verge of "no shave november", I thought I would just start my support of prostate health awareness early.  a lot of people actually asked me if i was a man or a woman.  before halloween people made fun of my "lame" and "unoriginal" costume idea, but when was the last time you saw someone dressed as a sheet ghost on halloween?  nobody had the same costume as me, and i had a lot of fun when they played the ghostbusters theme song at the bar :) 


 Food

Starbucks: This is the only way to eat breakfast when you've stayed up until 3am the night before.  We did that three of the four nights.


Ice Cream Sandwiches: These ice cream sandwiches were a serious FAIL!  For one thing, the freezer wasn't very cold to begin with, but we were also supposed to leave the ice cream in the freezer for four hours before cutting out each sandwich.  I waited 30 minutes and the cookie part was so hard that, while attempting to cut it, I just squished it down and all of the ice cream bulged out of the sides.  The decorating was fun, but only a very small part of the project.  In the future I would just buy ice cream sandwiches from the store and dip them in melted chocolate and decorate them with candies.   (from Michelle - my roommate Jill ate one a couple days after we made them and they had had time to harden up, and she said even though they look weird, they tasted good!)


Chocolate Covered Coffee Beans?  When I saw all that extra melted chocolate laying around, I thought, this would be a good opportunity to make chocolate covered coffee beans.  Well, there must be more to it than just having coffee beans and melted chocolate because the chocolate was so runny that I could keep it on just one bean and ended up making coffee bean chocolate bars. they are yummy, and deliver a lot of caffein, but I would like to look into making actual chocolate covered coffee beans in the future.

Pulled pork BBQ Sandwiches with Slaw and salad: Sadly we did not get a picture of this one even though we had it two of the four nights I was there.  The slaw is a great fresh side for the pork sandwiches.  Another product of Bon Appetit.  Here is the recipe.


New York Steak with Boursin and Merlot sauce, fried green beans and roasted potatoes: This was absolutely delicious, but a lot of food for one person.  Sadly I also forgot to put the Boursin cheese on top of the steak after removing them from the pan.  This is one of my favorite Bon Appetit recipes.


The result of all of our mad carving was a ton of pumpkin seeds.  I found a bunch of recipes online, but I wanted something cajun stlyle.  I was going to buy seasoning which is hella expensive, but I happened to be purchasing some chicken breasts from the butcher and remembered that you get free seasonings/marinades with your meat.  I got the perfect seasoning.  It was some sort of cajun, southwest, BBQ type of thing.  I just asked for it in a separate container and it was plenty for what I had.  The recipe is just vegetable oil, cajun seasoning and salt.  Super good and a nice change if you are used to the salt and Worcestershire recipe for pumpkin seeds.  

Being Crafty

jar and candle idea that i saw on pinterest, pinned from this 
blog.  hers are prettier.  think i need more of them and have
 them be inside to get the full effect.

michelle's pumpkin vs. julie's pumpkin.  i decided to go
off the grid with pumpkin carving this year and free style
them.  this was my first creation and it was a success.
when i saw the wind-up teeth at the dollar tree, i was
thinking, this will be a great spin on the marth stewert
project that julie did with pumpkins and dracula teeth
in this earlier blog.in the end i decided that this is just
creepy and not very cute.  won't be doing this next year.
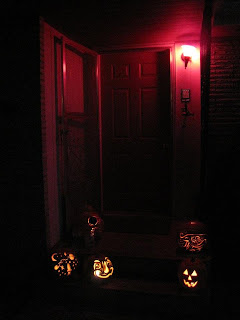
the full effect on halloween.  I got a red light because the bright white light that is normally there was making it hard to see the glow of the pumpkins.  only had one trick-o-treater, which is on par with the last 4 years, but that didn't stop me from buying 4 bags of candy.  I even bought the good stuff, or "rich people candy" as my roommate called it. 

Overall, a successful trip.  Julie got a lot of yardwork done, and cooking, and I didn't get any studying done while she was here.  Maybe I'll have better luck over thanksgiving break. the p-town sisters will be in the same town again, this time in Portland.

Sunday, October 23, 2011

what was in the box?

?????????????????????????????
?????????????????????????????


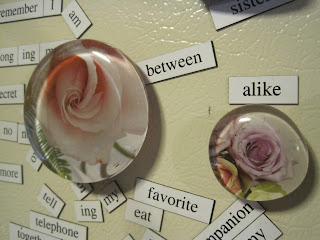
magnets!  that i made! 

this is a project that was first inspired in Seattle when i was with Amanda.  i bought a glass magnet that was of Seattle on a city map.  after i bought it i was looking at it and decided that i could definitely make it myself.  first, i had to buy the glass gems.  the best place i found to get them was craft warehouse.  they have a very large choice of sizes and come in large packs of just clear (not colored or iridescent).  the 1" glass gems are usually $3.99, but seem to go on sale a lot.  craft warehouse actually had the same project in mind that i did and even had a little section in craft warehouse with examples of how to make the magents. 

supplies to make magnets:


  • clear, non-iridescent glass gems
  • mod podge
  • magnets
  • magazines or whatever! 
  • 1" circle punch optional
  • glue


i have hundreds of magazines around because i like to decoupage, so i had plenty of pages to flip through to look for cool pictures to use.  i have lots of other ideas about what to use besides magazine clipping - there are so many possibilities.  i think my next project is going to be making "dorky" magnets using pictures from old textbooks that i have of different types of white blood cells and parasites (i'm going to scan the pages so that i don't ruin the book!).  to make the magnet, i brush a thin layer of mod podge on the back of the glass gem, and place a pre-cut out 1" paper circle (or whatever size glass gem you have) on the back.  after it's placed it might need to be trimmed if it's not perfect because each glass gem is unique. next, i used a glue gun to attach a magnet to the back.   


i just used medium strength magnets like these.  they are strong enough to hold up the 1" glass jem plus 1-2 pieces of paper.  as you can see i also made some larger magnets (2.5" diameter).  this was where i ran into some problems.  first, the medium strength magnets are barely strong enough to hold up just the glass gem and definitely not any paper.  so i had to go back to the craft store to look for stronger magnets.  i found some but they only come in packs of 4 so they are a lot more expensive per magnet.  the magnets were very strong and able to hold up the larger glass gem and multiple pieces of paper.  i was pleased, but then...two of my strong magnets stuck together and when i went to pull them apart, they were so strong that instead of coming apart, it pulled the paper off of the glass gem.  so i have learned to remove magnets with a sliding motion and not pull directly out.  finally, one day, the glass gem just fell off the fridge, leaving the magnet behind.  the stronger magnets are a smooth metal so the glue gun doesn't have any pores to attatch to and the two smooth surfaces do not stick very well.  so i'm still working out the kinks with the larger, heavier glass gems.  i'm also thinking i will need to start buying supplies in bulk on-line to cut costs. 

overall, i'm very pleased with the result and i love making these little "gems".  the problem is, i have about 100 new magnets.  i'm going to have to start giving them away to more friends